Patient visits and how to book and how to manage
Patient appointments can be booked as series or single appointments. To book appointment series, an appointment schedule needs to be created first. Check here how to do it. To book single appointments, please check below how to do this.
Set and appointment schedule and book appointment series
In order to book appointment series, an appointment schedule needs to be created first.
Therefore, you will need to:
Set Appointment schedule - this will determine the frequency and the type of appointments for a schedule. The appointment schedule should be decided at the beginning of the study and before starting to book appointments. Multiple appointments schedules are possible for the same study (to a maximum of 5).
Set Appointments series for patients. Find more information below.
Let’s look at these points in more detail.
Plan an appointment schedule - for a study
Warning
Please set the appointment schedule at the beginning of the study, before starting to book the appointments for the different patients.
Note
Only the manager or user can set an appointment schedule for a study (and further booking appointments).
Note
Do not forget to select your study beforehand.
To create an appointment schedule navigate to: Appointment schedules > Create Appointment Schedule, under the “Study” section. Up to 5 appointment schedules are possible for each study.
Note
Day 1 here will be the “reference” day from which the appointments dates are calculated. Day 1 will vary depending on the study. For example, for the STCS it will be the transplant date. It can also be the first day the patient joins the stufy.
Here you can specify the:
Type of visit: screening, randomization, enrolment, follow-up and unplanned.
Additional name: this is meant to be used when multiple appointments of the same type (for example, multiple follow-ups) are planned. Some studies also have defined names for the specific appointments, which can be specified in this field.
Years from day 1: years from day 1.
Days from day 1: days from day 1.
Duration: duration of the appointment - this is only relevant when booking the actual/definitive appointment, and it can be edited after. A default option is available as 00:30:00 (30 minutes).
Minus day range: this is the minimum tolerance range to book the actual/definitive appointment. It will be calculated minu days from day 1. The default option is -2 days. Currently, the minimum minus day range is -100.
Plus day range: this is the maximum tolerance range to book the actual/definitive appointment. It will be calculated plus days from day 1. The default option is 2 days. Currently, the maximum plus day range is 100.
Repeat appoint.: select “no repetition” if you don’t want this appointment to repeat, otherwise several options to repeat appointments are available (every month, every 2nd month, etc).
Years repeat: once an appointment is set to repeat, this option will appear. Here you can select for how many years you want your appointment to repeat.
See below the appointment schedule for the study Wine and Cheese.

We called this appointment schedule “WaC-primary”. This appointment schedule starts with a “Enrolment” on day 1. A “Follow-up” appointment after 10 days, and then a series of monthly “Follow-up”, for 10 years. Note how for each appointment type a different “plus” and “minus day range” can be set.
The appointment schedule can then be visualized by navigating to: Appointment schedules > Appointment Schedule list. When double clicking on the Appointment settings or using the dropdown menu (see orange arrows in the figure), the Appointment Schedule will expand.

Edit or delete an appointment schedule
This appointment schedule can be edited or deleted using the following icons:

Plan an appointment series for a patient
Warning
Make sure your Appointment Schedule is correct before booking any patient appointments.
Warning
An update to the Appointment Schedule will not update appointments already booked with a previous Appointment schedule.
Below, we will be planning appointments, i.e. scheduling the appointments timings. How to book the actual/definitive/confirmed appointments) will be shown in this section.
To create an appointment series, go to the “Study patients” section, navigate to Appointments > Create Appointment Series, and make sure you select your study (in this case, Wine and Cheese) in the Study filter. Then, select the patient (for example here Cristiano Ronaldo) and the day 1 for this patient (preferred starting date and time) and save.

As shown above, the appointments have been scheduled accordingly with the appointment schedule described above (“WaC - primary). Note how the appointment dates were calculated on the Day 1 (2024-08-19).
Plan an appointment series for multiple patients
You can book appointments for multiple people, by holding the ctrl key while selecting the patients with the left-click of the mouse.

Plan a single appointment for a patient
To plan a single appointment for a patient (for example, an unplanned appointment), please navigate to: Appointments > Create Single Appointment and select the study (in Study filter). Select the patient, the type of visit and the scheduled date (appointment range and/or duration), and save. For example, David Beckham will have an unplanned appointment on the 27 of August 2024:

This appointment can be then visualized together with the other appointments in: Appointments > Appointment List.
Note
To schedule the actual/definitive/confirmed appointment time and day, check this section.
How to visualize planned appointments
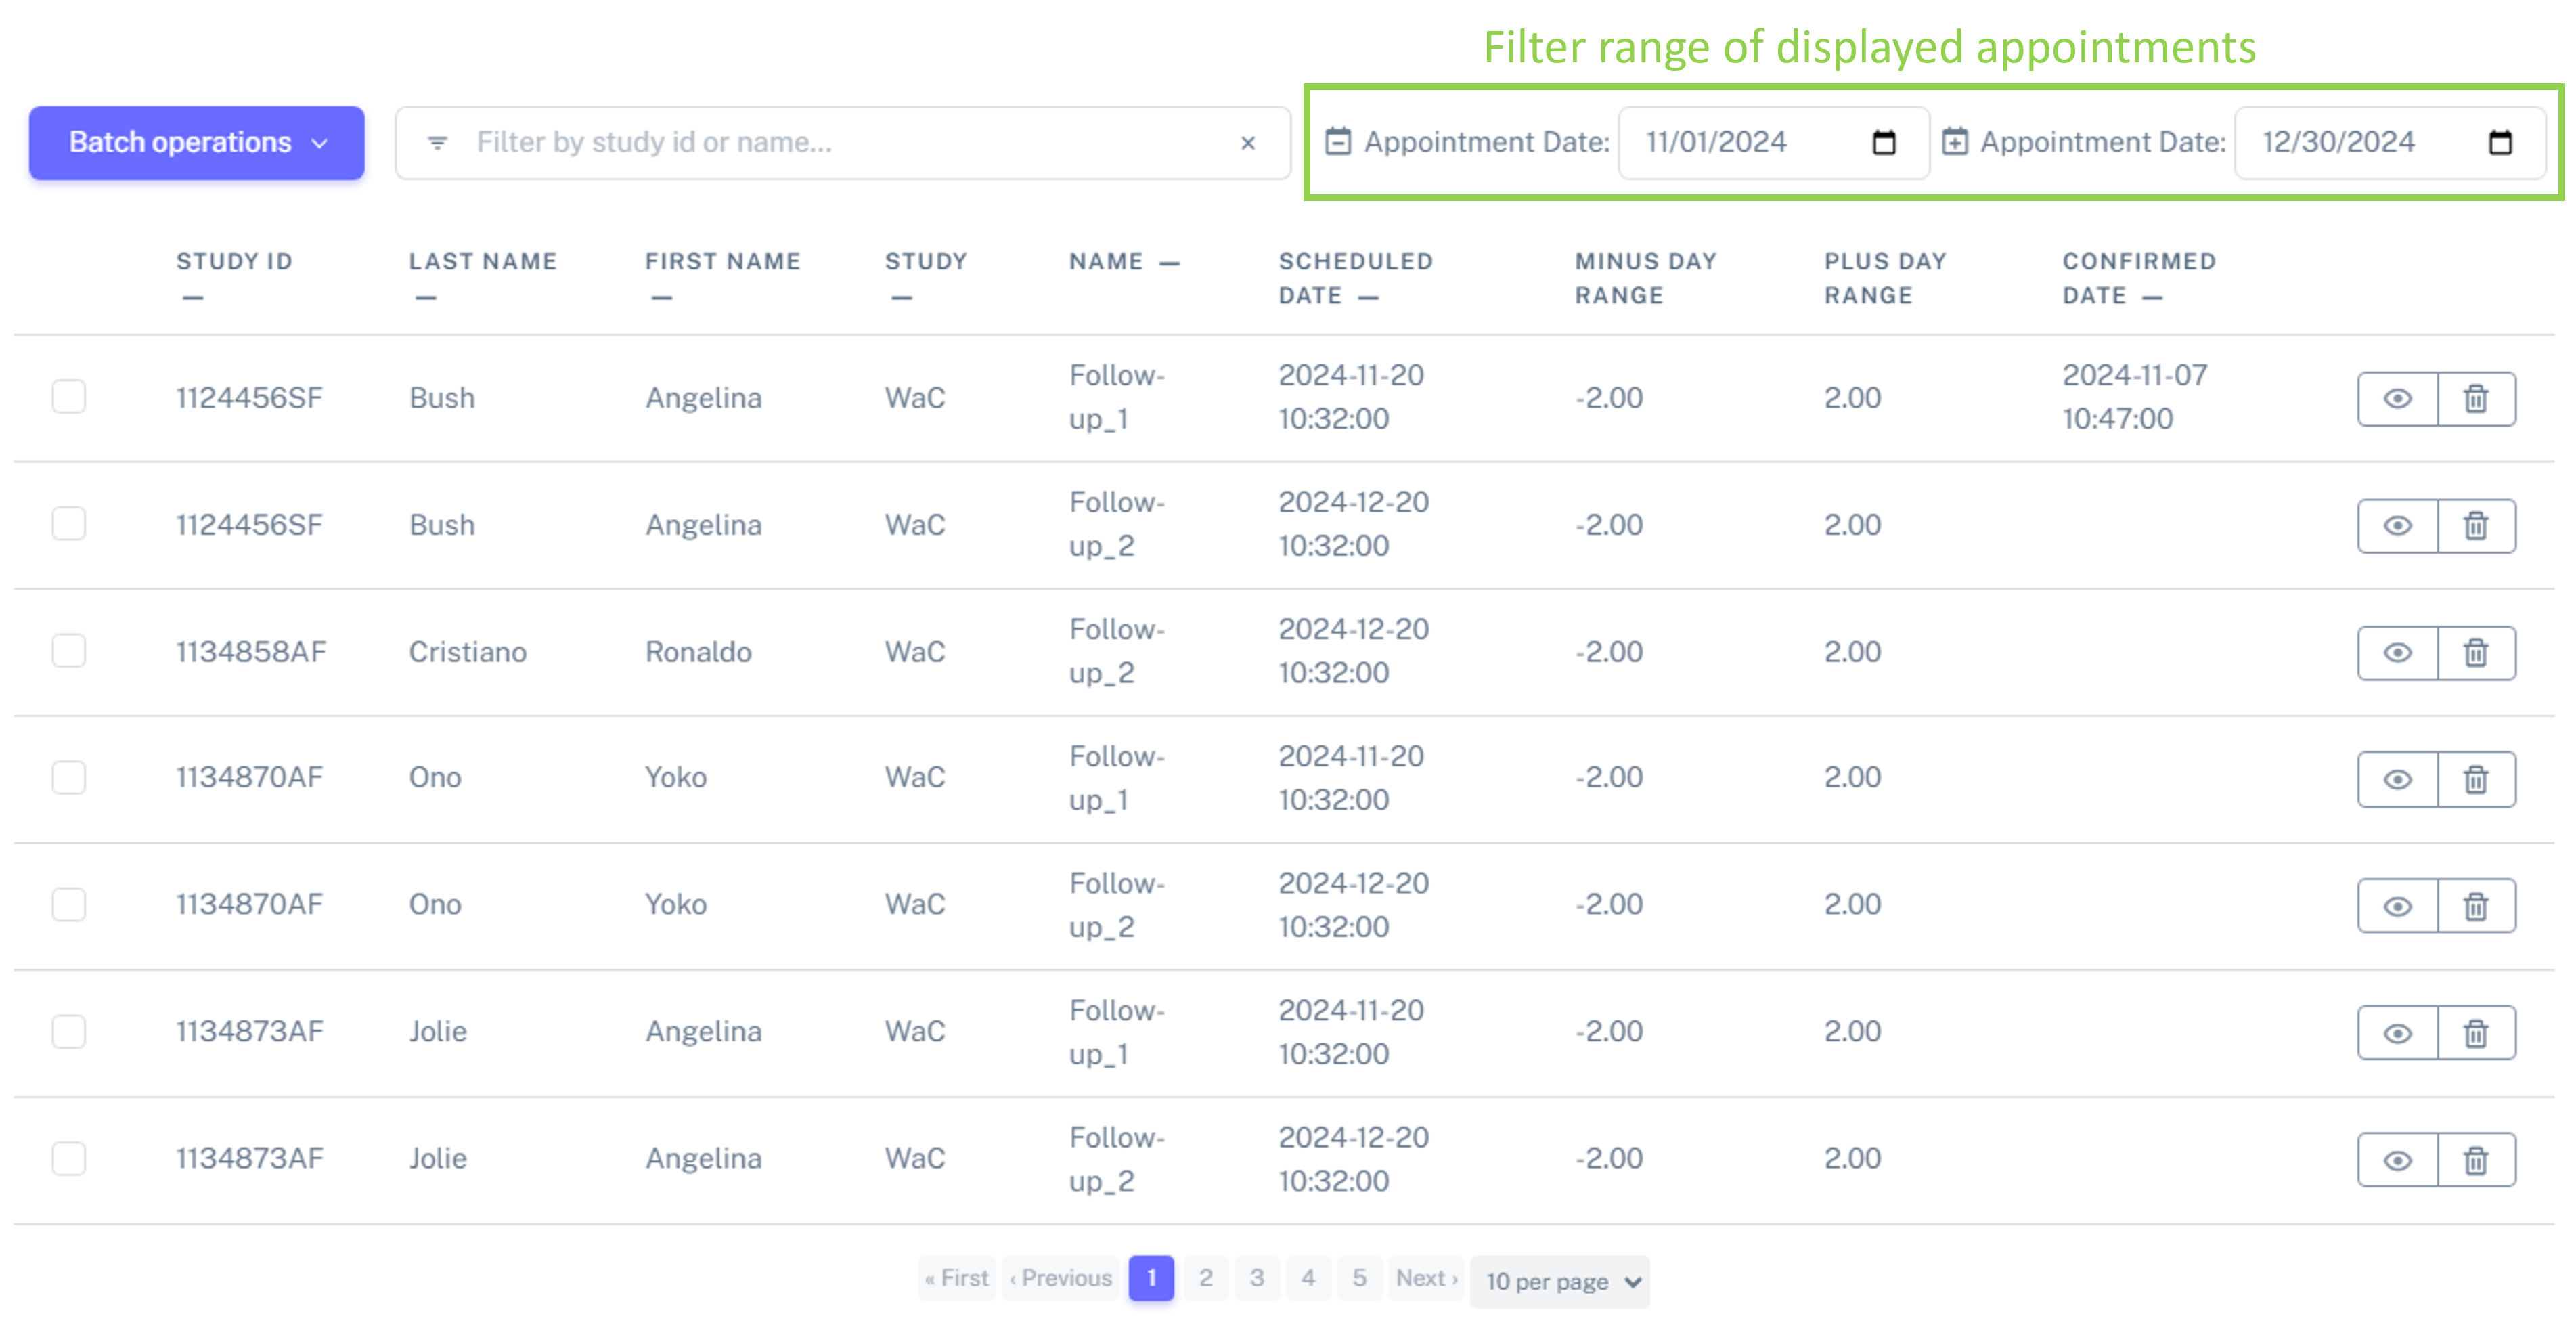
You can visualize these appointments (both planned in series and as a single appointment) in the Appointments > Appointment List. This table can be sorted by Study ID, Last name, First name, Study, Name (type of appointment), Scheduled date and Confirmed date. For that, just click on the -, as shown below (orange arrow).

You can also use the icons to either View or Delete the appointment.

Filter range of appointments
You can customize the displayed appointments by filtering them based on a specific time range, as demonstrated below.
How to book an actual/definitive appointment
So far, we just planned patient appointments. However, IDEAL also allows to register the actual/definitive appointment.
There are 2 ways of doing this:
Book an actual appointment via the Appointments list
For this, navigate to Appointments > Appointments List > View > Edit Appointment, as shown below (pink arrow):
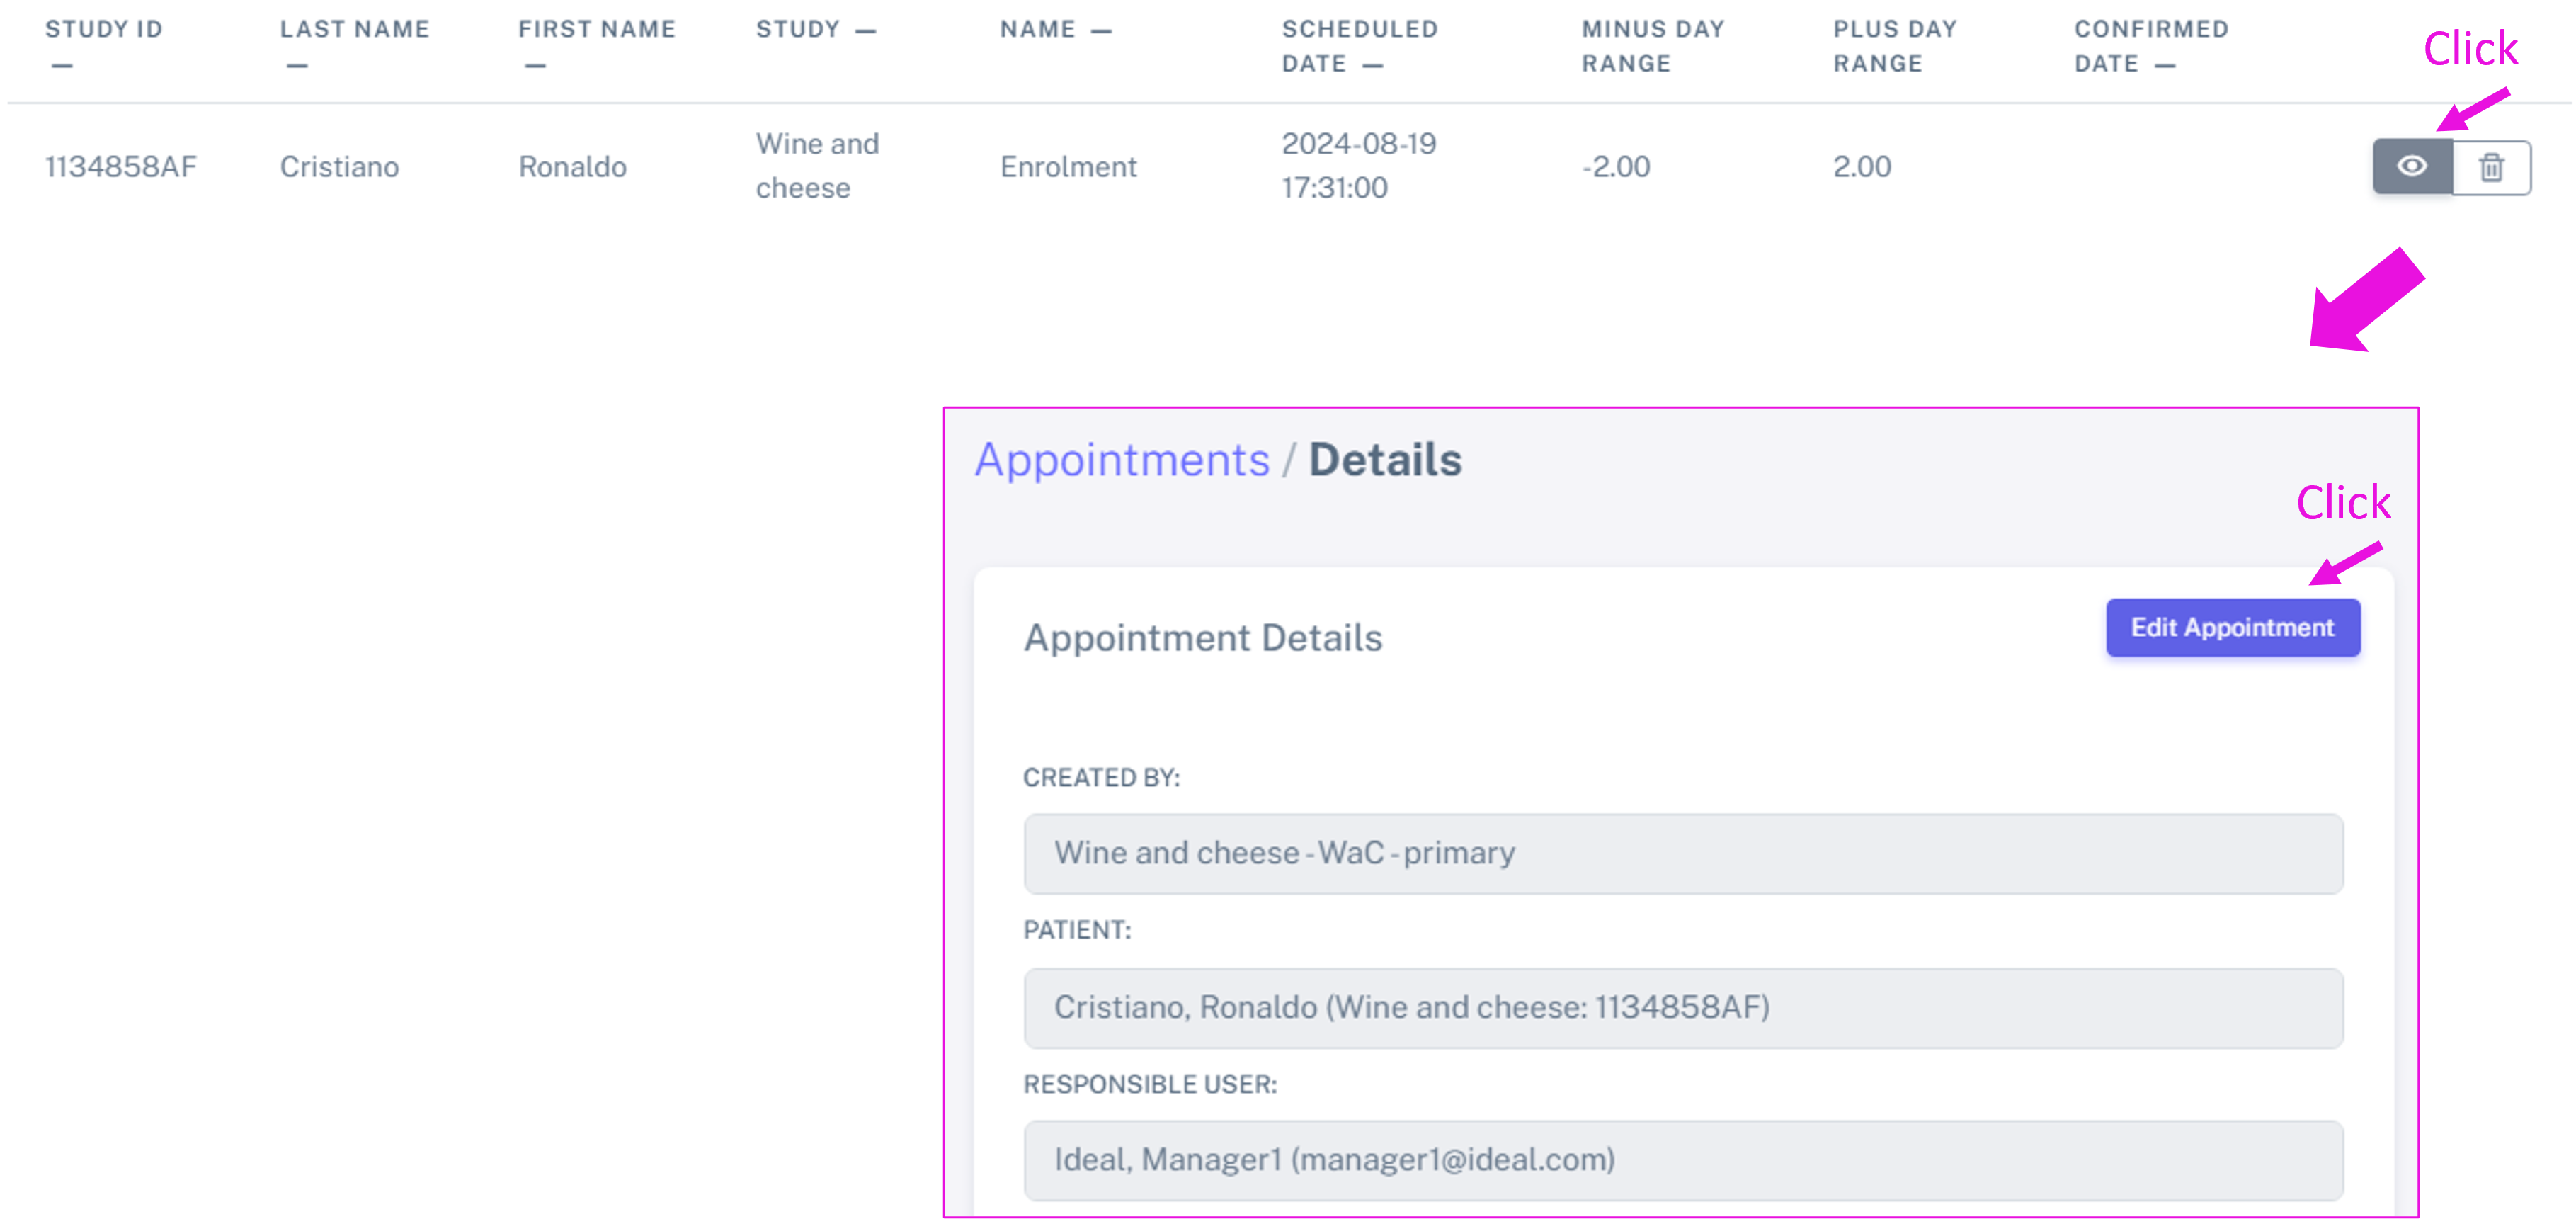
This will open a new window where the details of this appointment can be seen. Here you can then select the Actual date (or definitive), as shown below, and edit the confirmed date. In the case if Cristiano Ronaldo will have his Enrolment visit on the 2024-08-20 at 4.30 pm. The confirmed appointment can be then seen on the Appointments List.

Book an actual appointment via the Calendar
You can also book the actual/definitive appointment directly from the Calendar (for more information about the calendar, please check this section: Calendar to view patient appointments). To access this, go to Appointments > Appointments calendar.
First, make sure you are on the scheduled view of the calendar. Then you just need to double click on the appointment and the window to update the appointment will appear as above.
How to delete appointments
There are many ways to delete appointments, either by deleting appointment series or selecting specific appointments to be deleted.
How to delete appointment series
In order to easily delete appointment series, you can navigate to Appointments > Delete appointment series, under the Study patients section.
Here, you need first to select the schedule which was used to book the appointments and then the patient. You will also have the option to delete only future appointments (for example, if the patient drops out from the study) or all the appointments.
Below you can see an example, in which all the future appointments of the patient Angelina Jolie are being deleted.

Note
By choosing the Appointment Schedule first, only the subsection of the patients (with appointments booked with this appointment schedule) will be displayed.
How to delete specific appointments
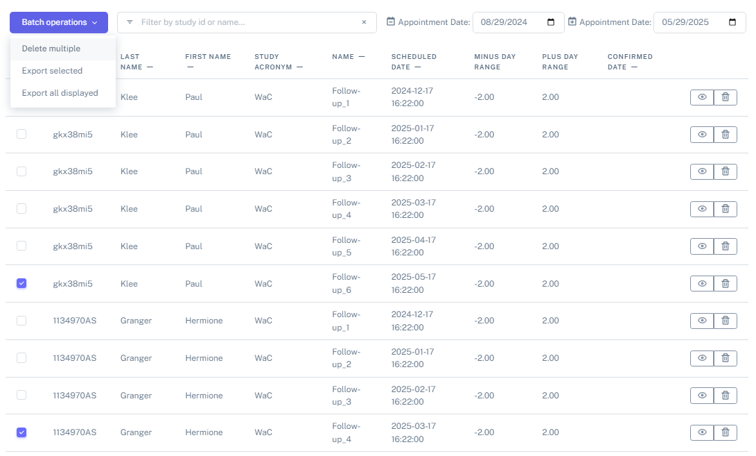
Please navigate to Appointments > Appointments List. Here you can select which specific appointments you want to delete, as shown below, and then select Batch operations > Delete multiple.
How to export appointments
Appointments can be exported by navigating to Appointments > Appointments List, and then selecting Batch operations.
Here, 2 options are available: Export selected as list and Export all displayed as list.
Note
Appointments can be exported in the following formats: .csv, .pdf and .ics (calendar format).
Tip
See how to integrate these appointments into your calendar by checking this section.
Warning
Be aware that if an appointment has a confirmed date - the confirmed date will be exported (and not the scheduled range).
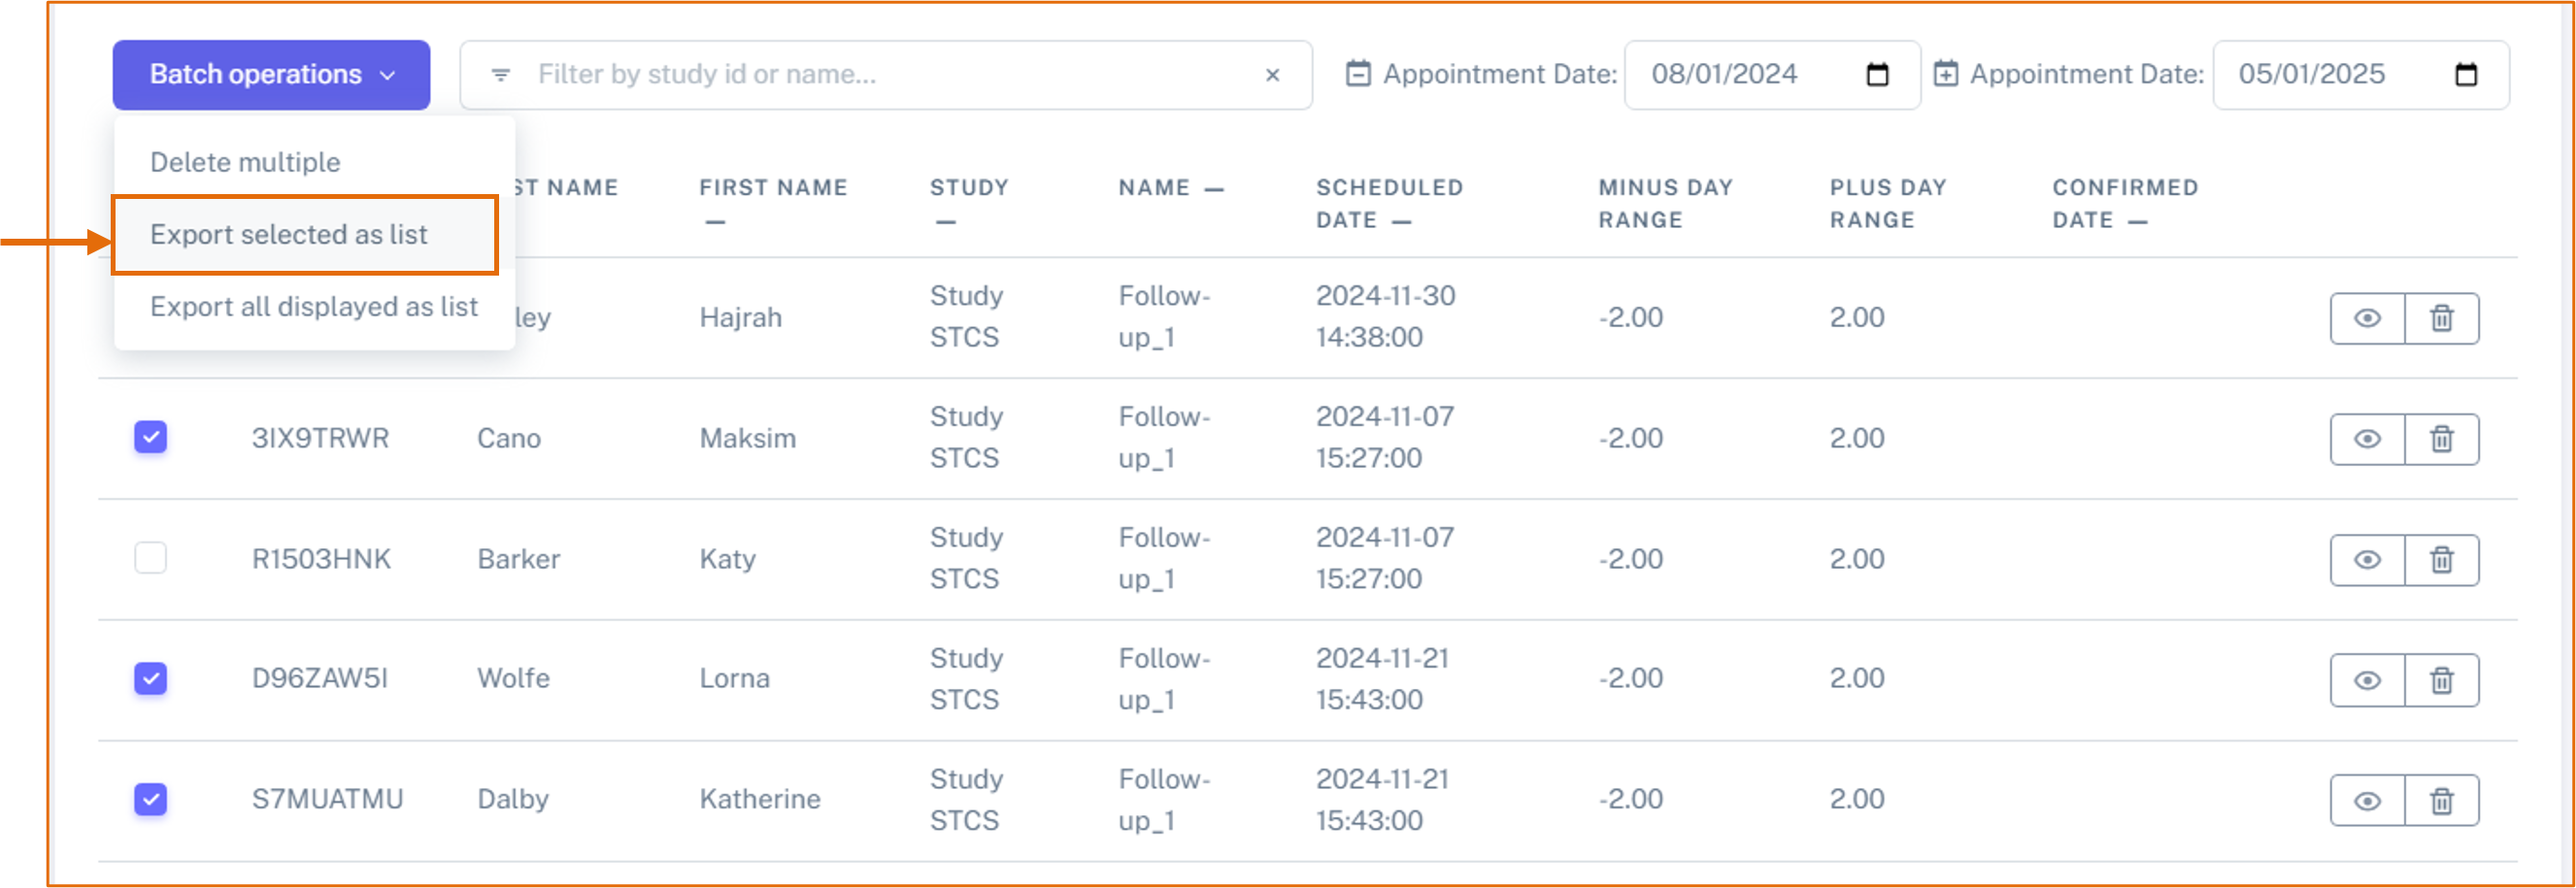
Export selected as list
Here, you can select select the specific appointments to export, by ticking the boxes, as shown below. Then select Export selected as list in the Batch operations.
Export all displayed as list
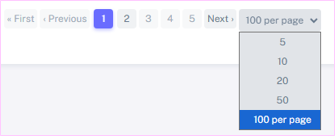
Here the appointments which will be exported are the ones currently in the table view. You can modify this by either changing the list length at the bottom of the page (see below) or adjusting the time range in the filering option.